
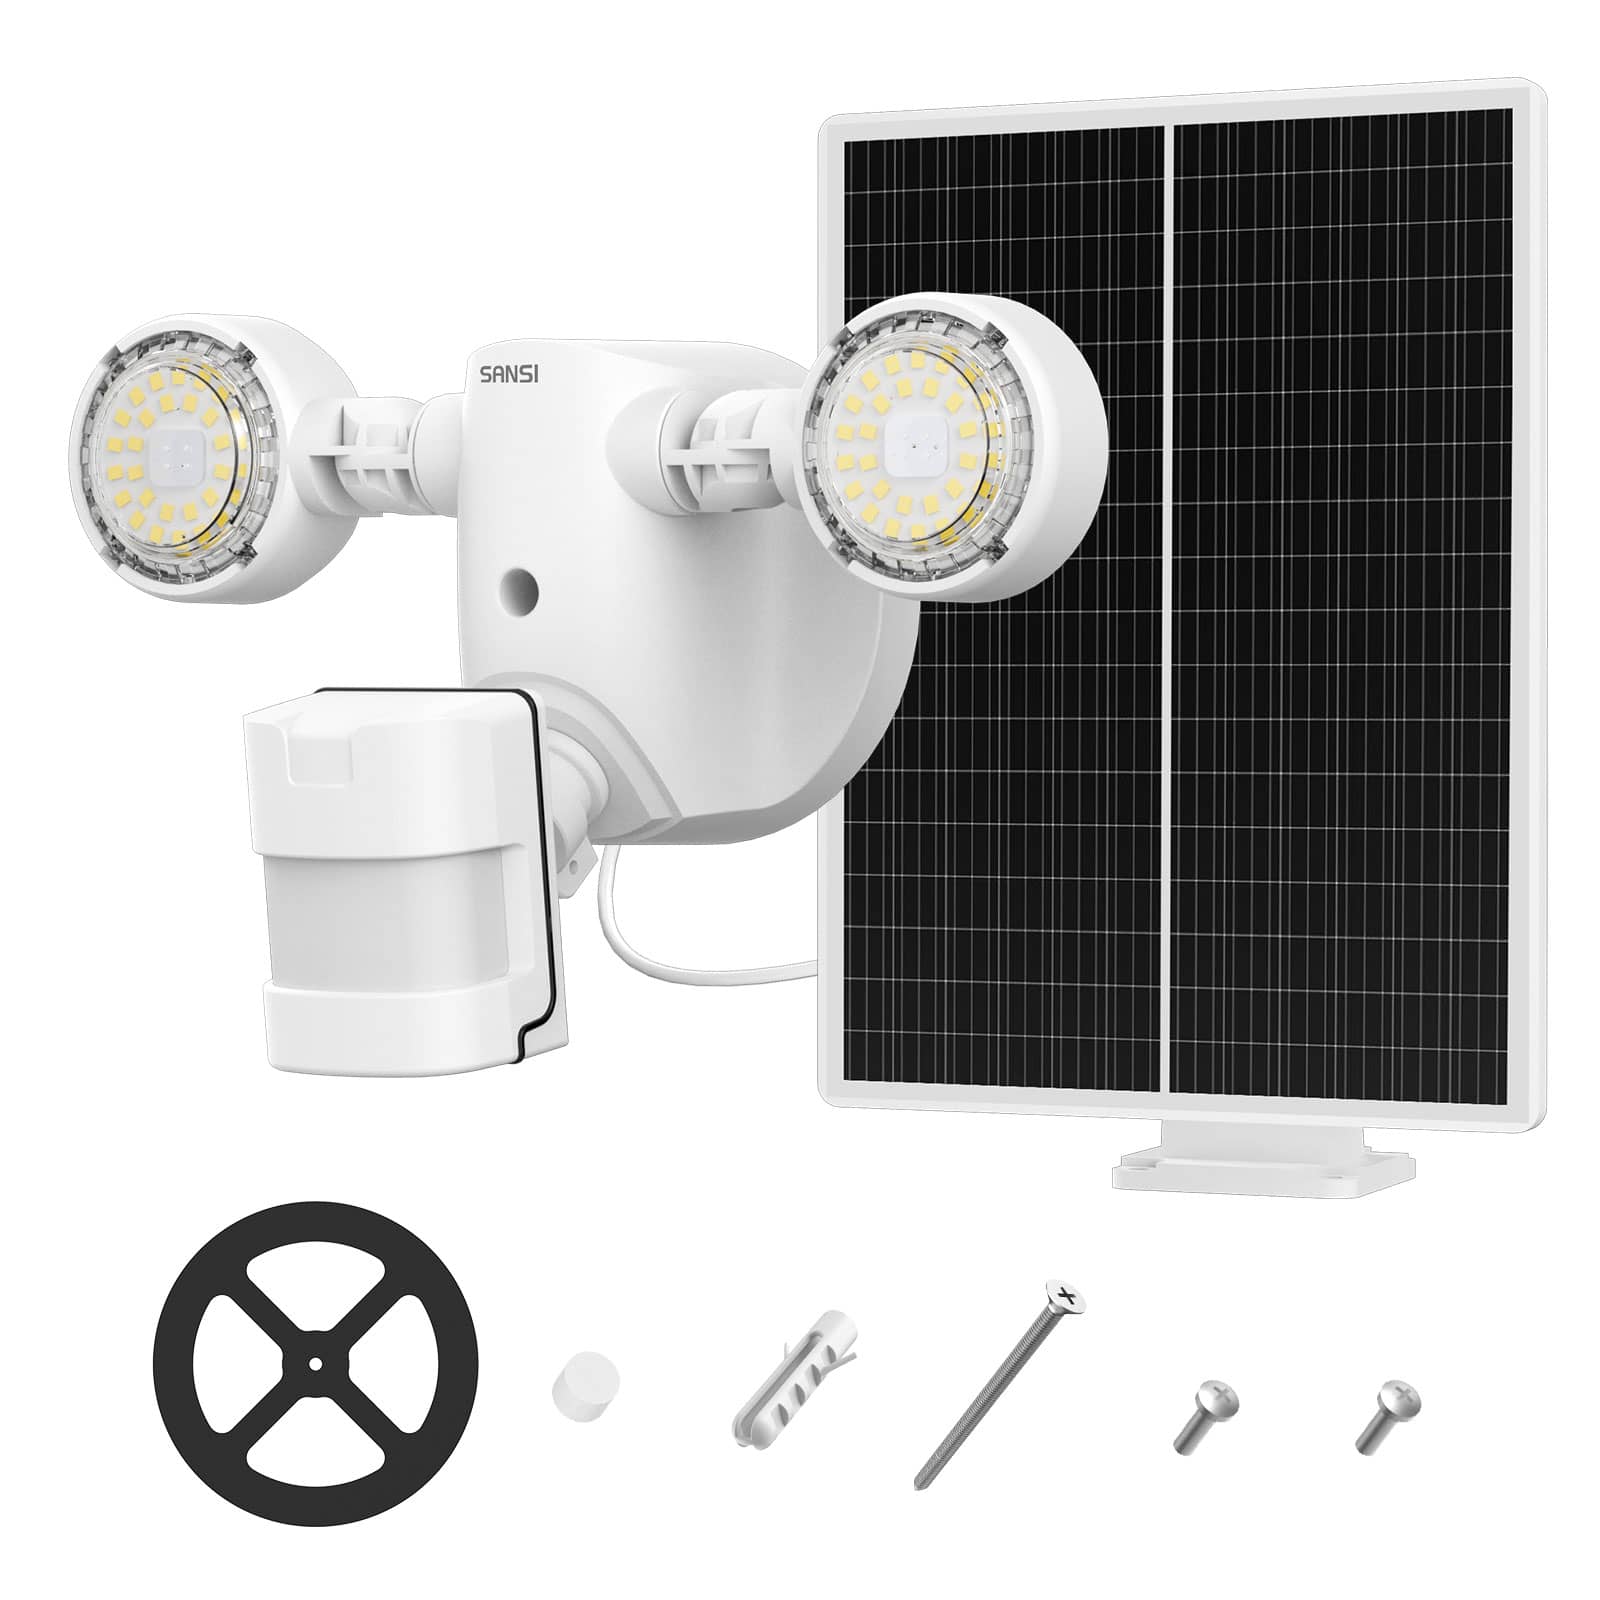
3.5W Outdoor Solar Security Light (Motion Sensor)(US ONLY)
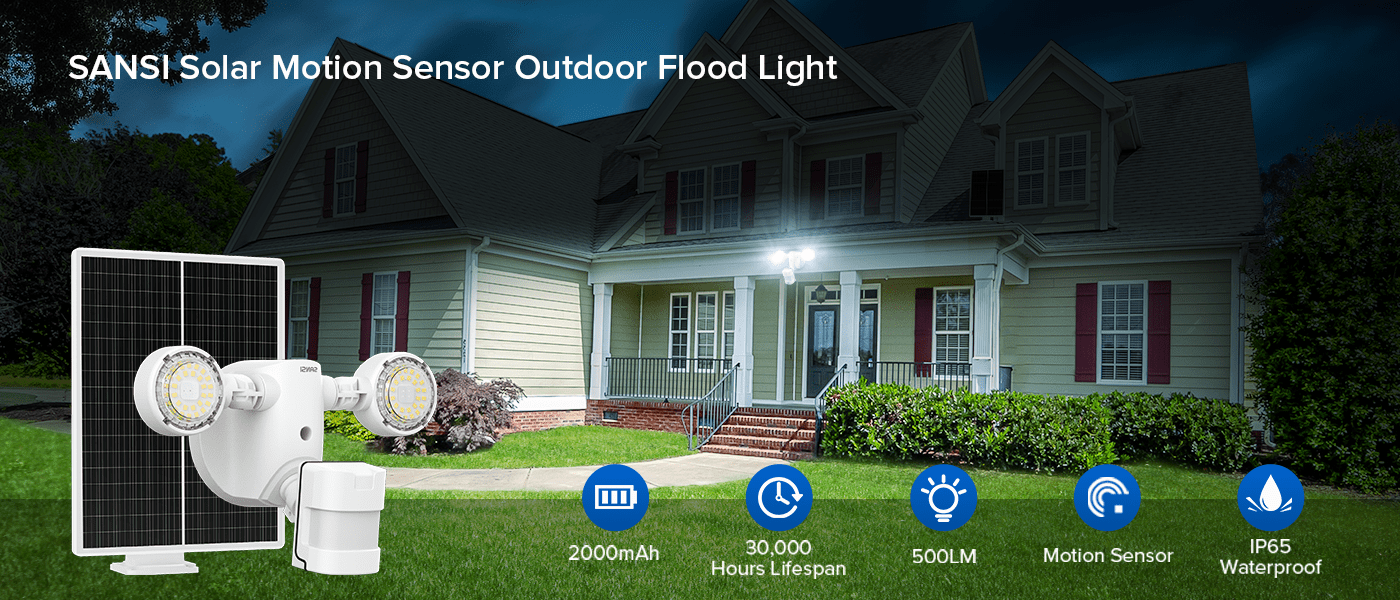
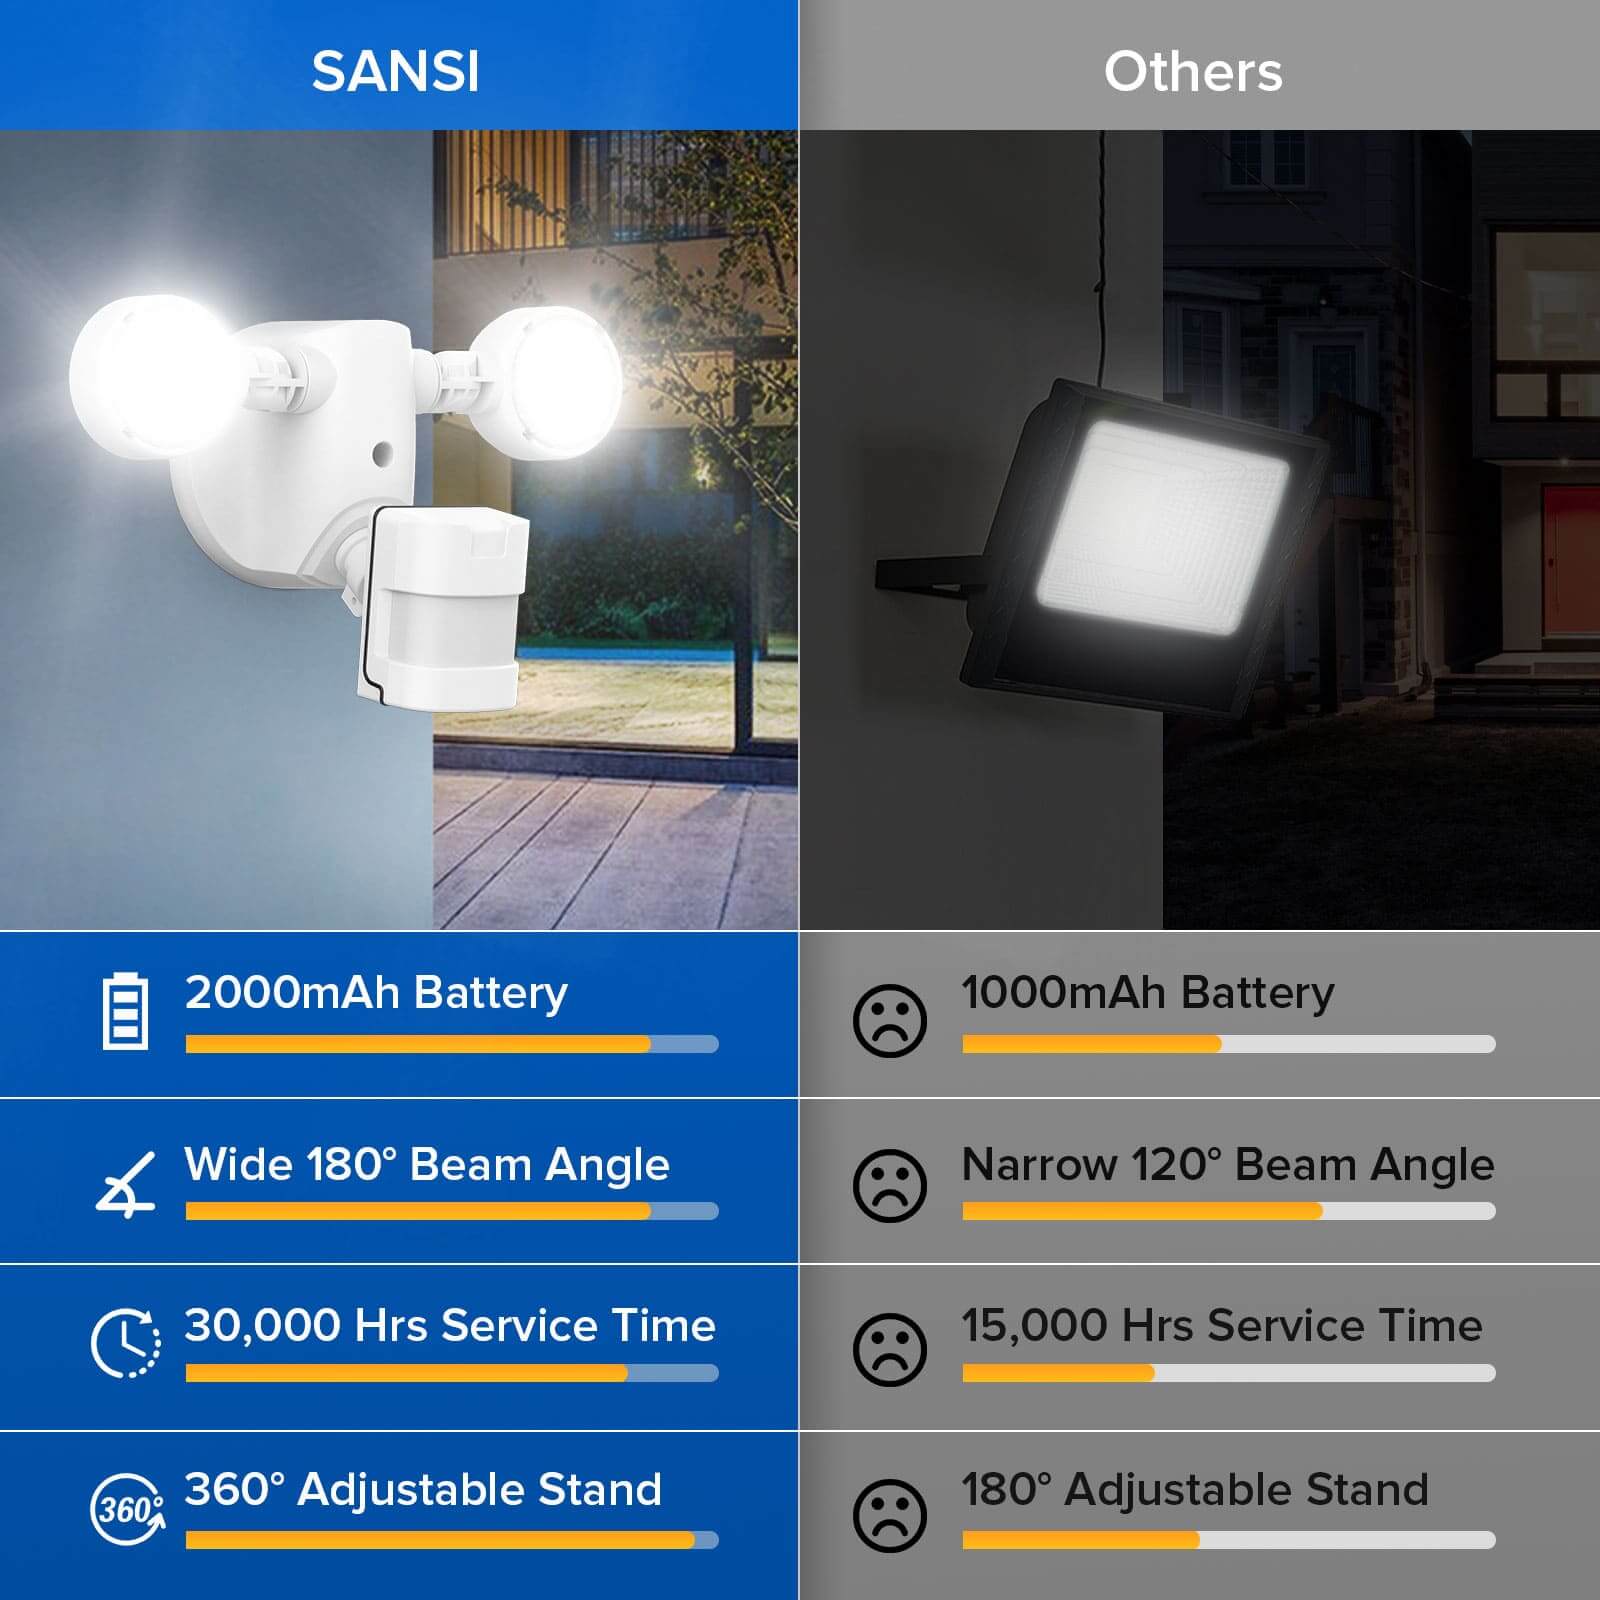
SANSI Outdoor Solar Flood Light, 500LM Motion Sensor Flood Light with 3 Working Modes, IP65 Waterproof 5000K Daylight Security Light with 2000mAh Battery 30,000 Hrs Lifespan for Patio Yard Garage.
- 30% OFF for above 10 Items, Auto Code
- 40% OFF for above 20 Items, Auto Code
- Can be customized as required
NOTICE: Only suitable for 1-pack Size
Features
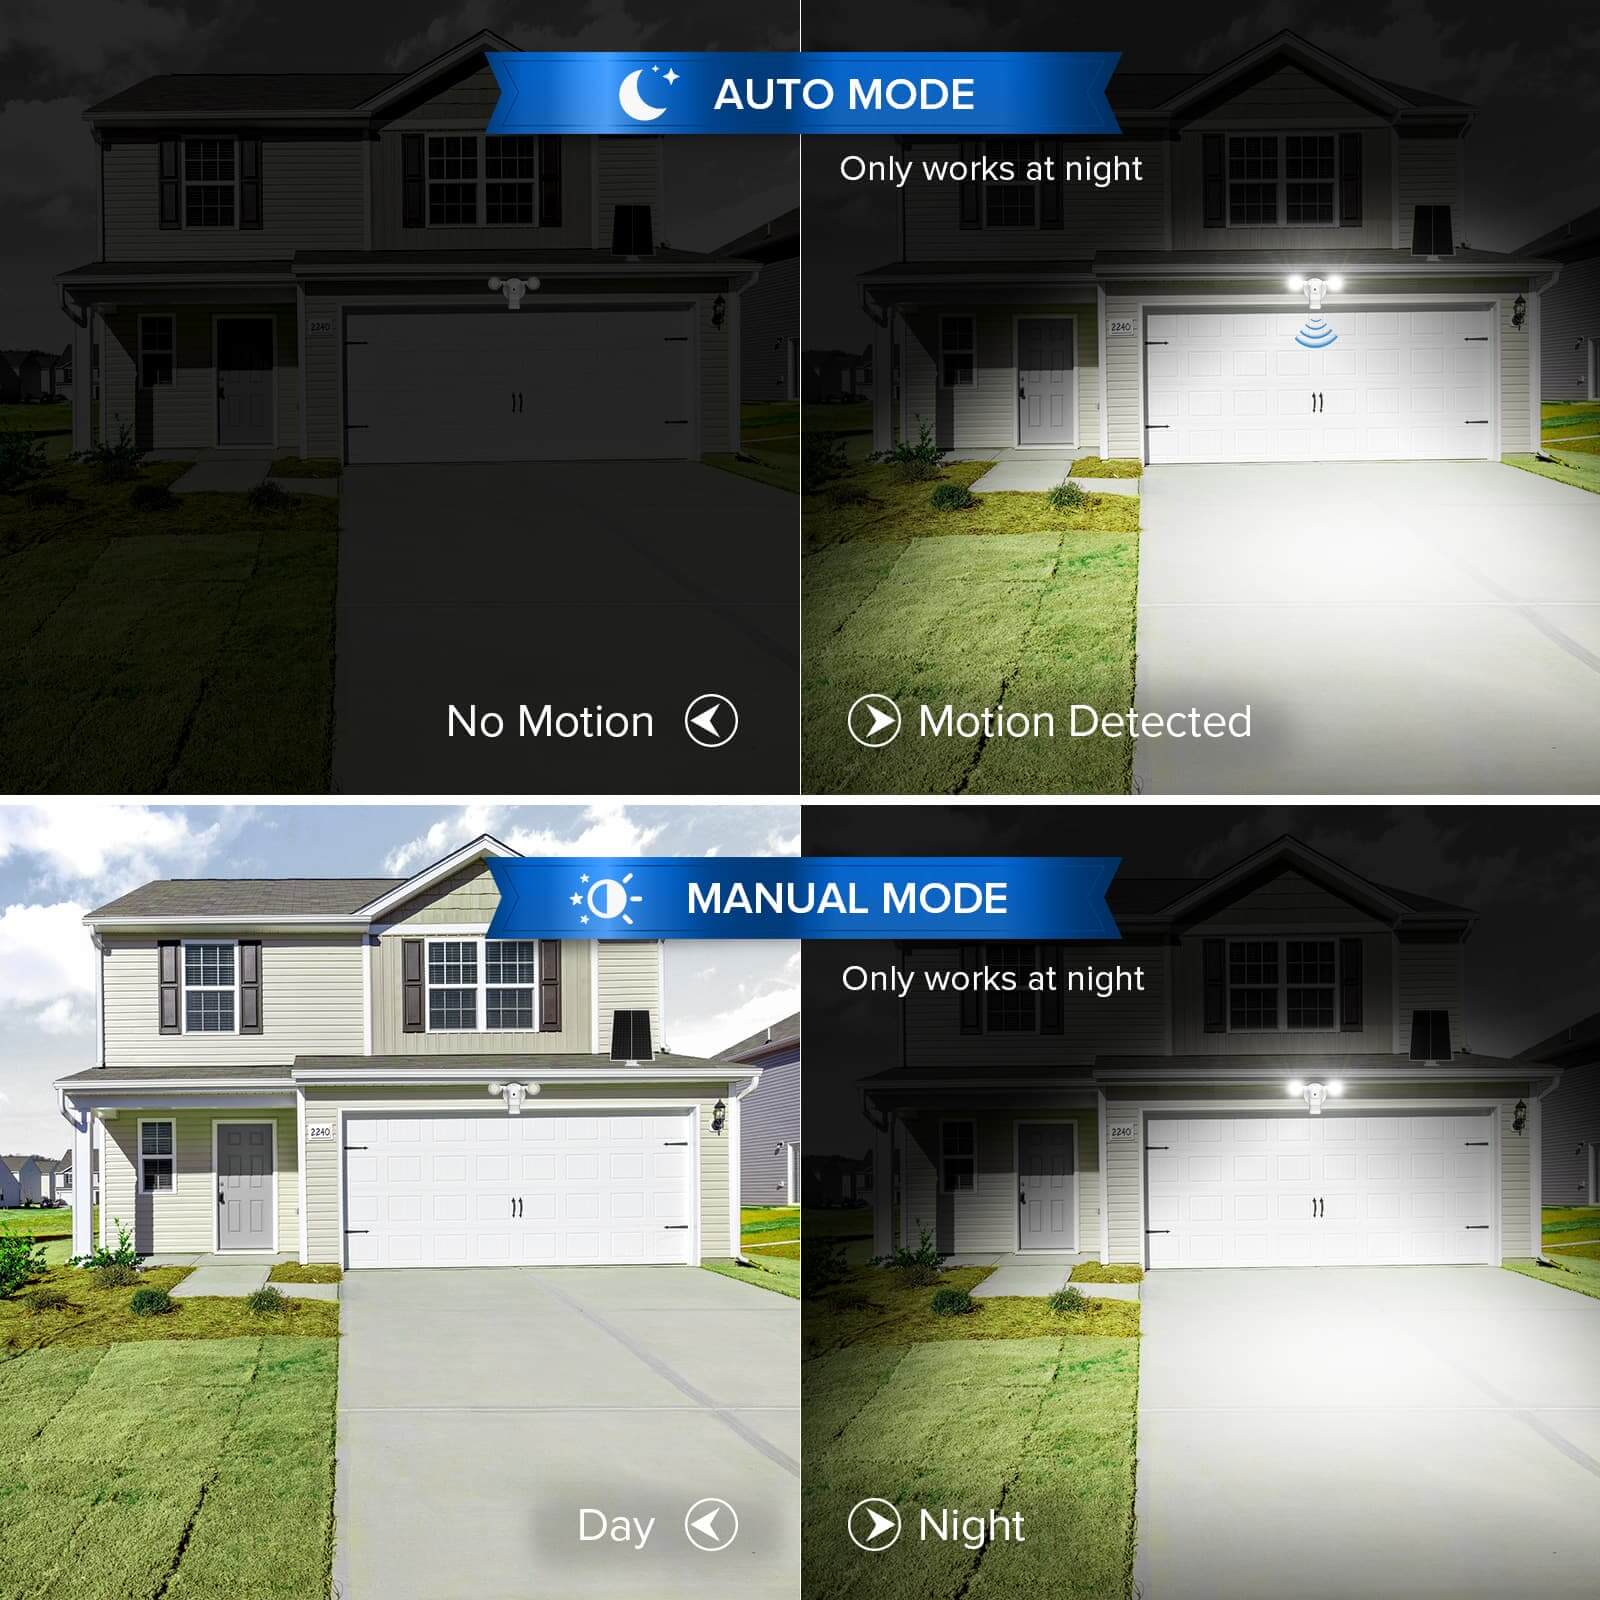
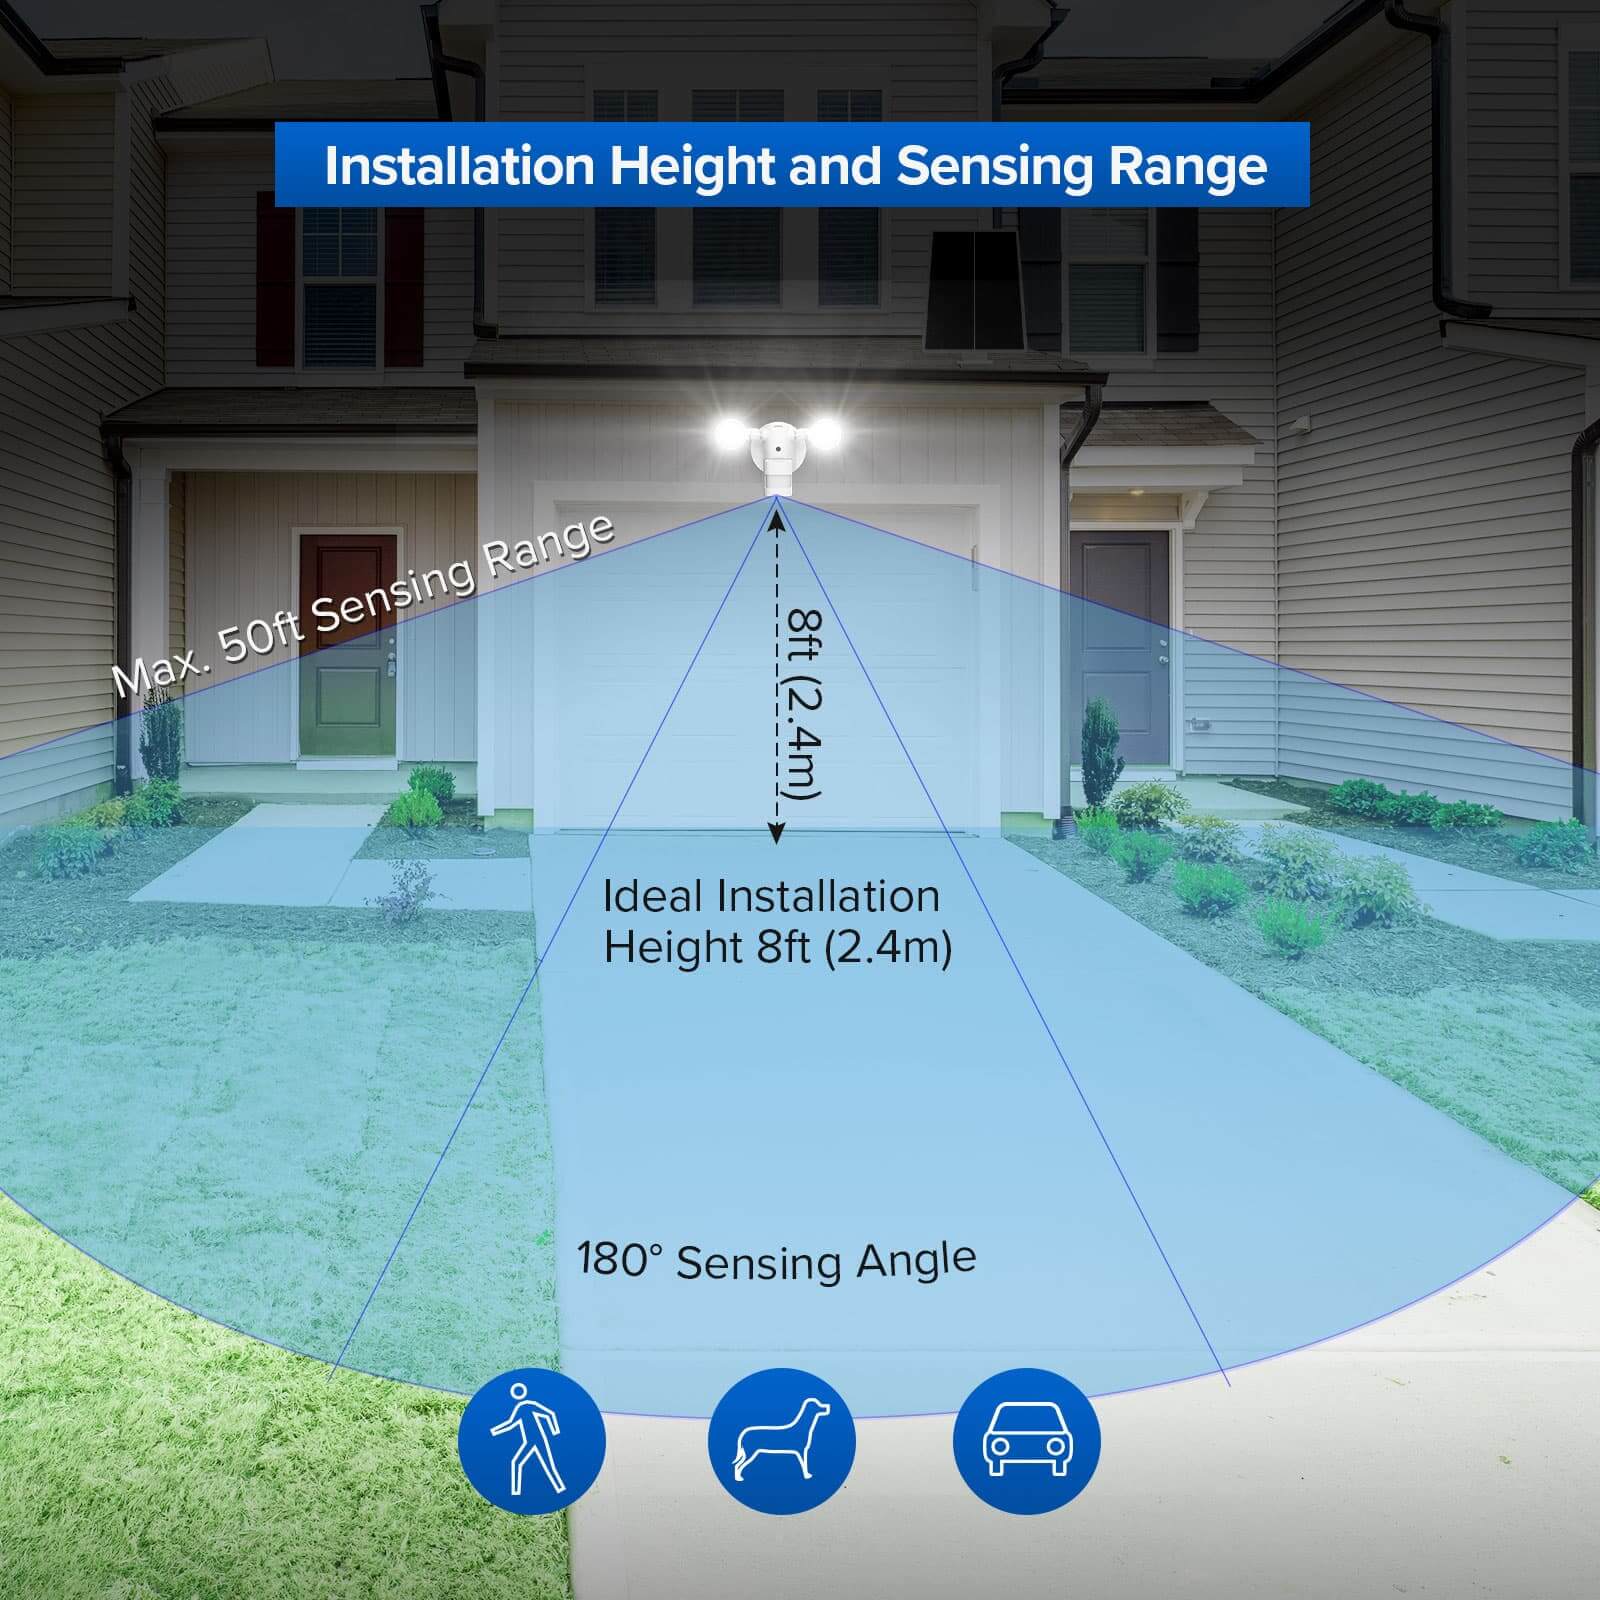
1. 3 Working Modes: Auto (Motion Sensor) Mode: Detects ambient motion to turn on the light. The max. detection range is 50 FT and the detection angle is 180°. Manual Mode: Manual controls lights keep ON by switch. Test Mode: Detects ambient motion to turn on the SANSI flood light for 5 seconds.
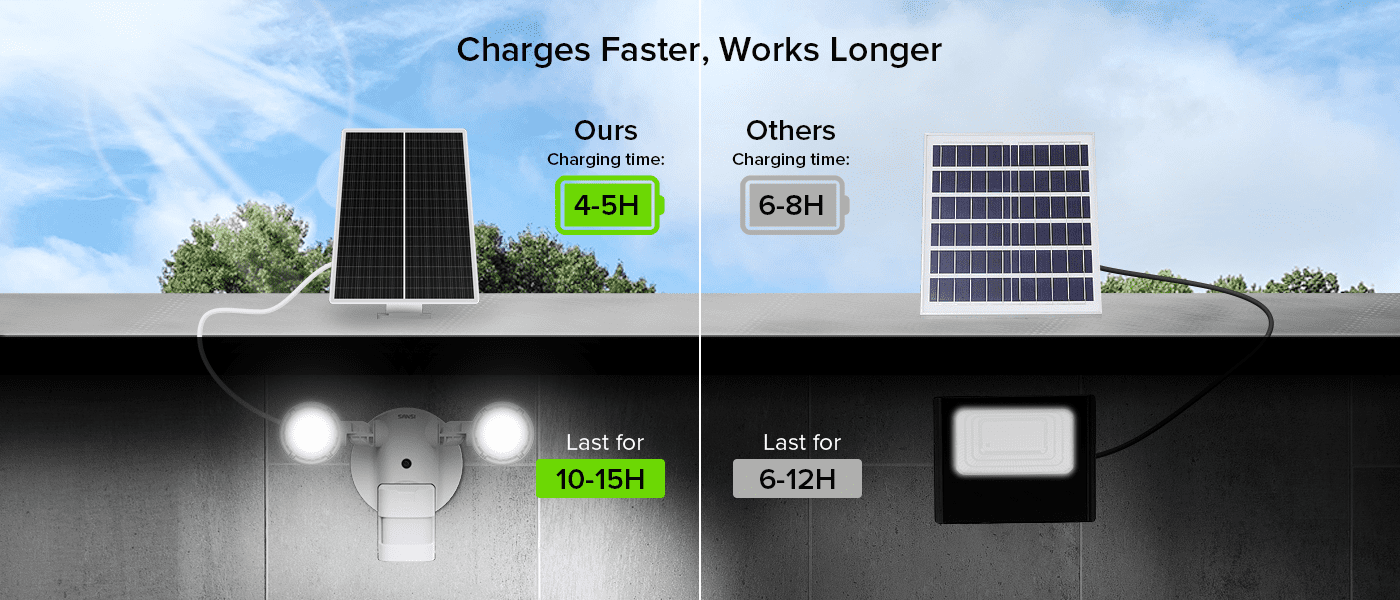
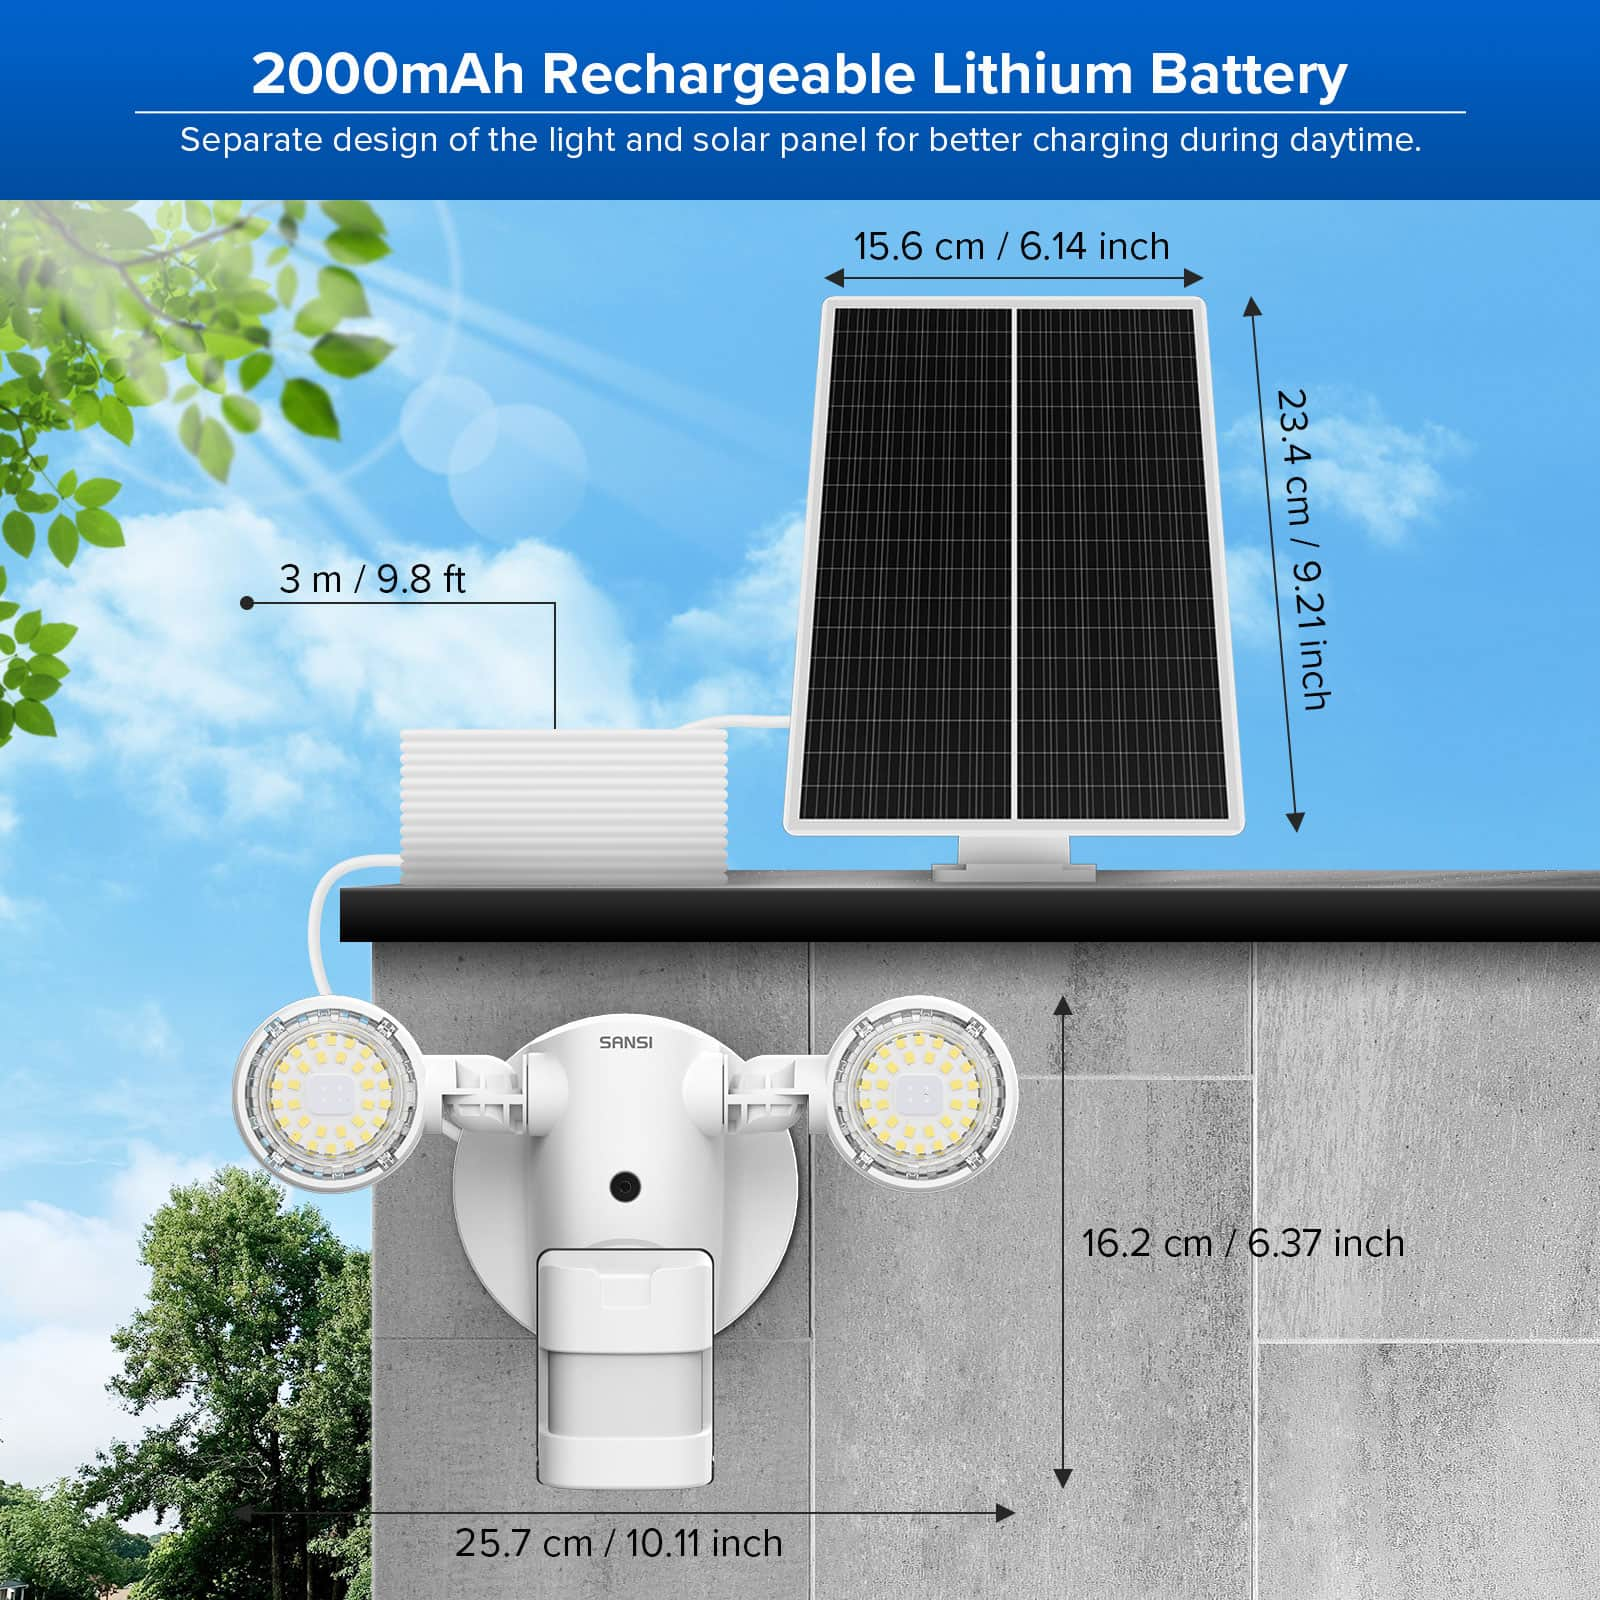
2. Split Design: SANSI 3.5W solar flood light and the solar panel can be placed independently connected by a 9.8 ft cable, giving you the flexibility to customize the lighting to your needs. With a ultra-large 2000mAh lithium battery, the outdoor solar light can power your outdoors for up to 10-15 hours.
3. Wide Angle: This solar motion sensor light outdoor provides wide 180° detection angle, can protect your home against intruders. The stand for solar panel is 360° adjustable and it is convenient for you to adjust the solar panel.
4. IP65 Waterproof: The IP65 weatherproof design ensures safety for outdoor use, protecting the lamp from rain. Good lighting solution for the patio, porch, back yard, front door, garage, driveway, walkway, step, etc.
5. Guarantees: We provide 12 months warranty for this solar motion sensor flood light outdoor, quality and safety verified.
Specification
Item Model Number: C21AF003
Wattage: 3.5W
Voltage: AC 120V 60Hz
Part Number: 01-04-001-835501
Material: Ceramic, Polycarbonate
Power Source: Solar Powered
Coverage: 50 FT
CCT: 5000K
Brightness: 500 lm
Working temperature range: -25~+40℃
Product Dimensions: 10.11"L x 10.11"W x 6.37"H
IP Rate: IP65
Weight: 2.5 lb
How long will it take for my order to arrive?
It takes 2 working days by Express shipping after you place an order and we complete shipment. For Standard shipping, most orders will arrive 3-5 working days after shipment is completed.
We are not liable to any shipping delays, nor loss of any kind caused by unforeseen and uncontrollable circumstances, such as unreachable recipients, invalid addresses, weather conditions that affect delivery, customs clearance delays and so on. In these situations, SANSI will try our best to notify customers of the delay, and if possible, make new delivery/collection arrangements with an estimated delivery date.

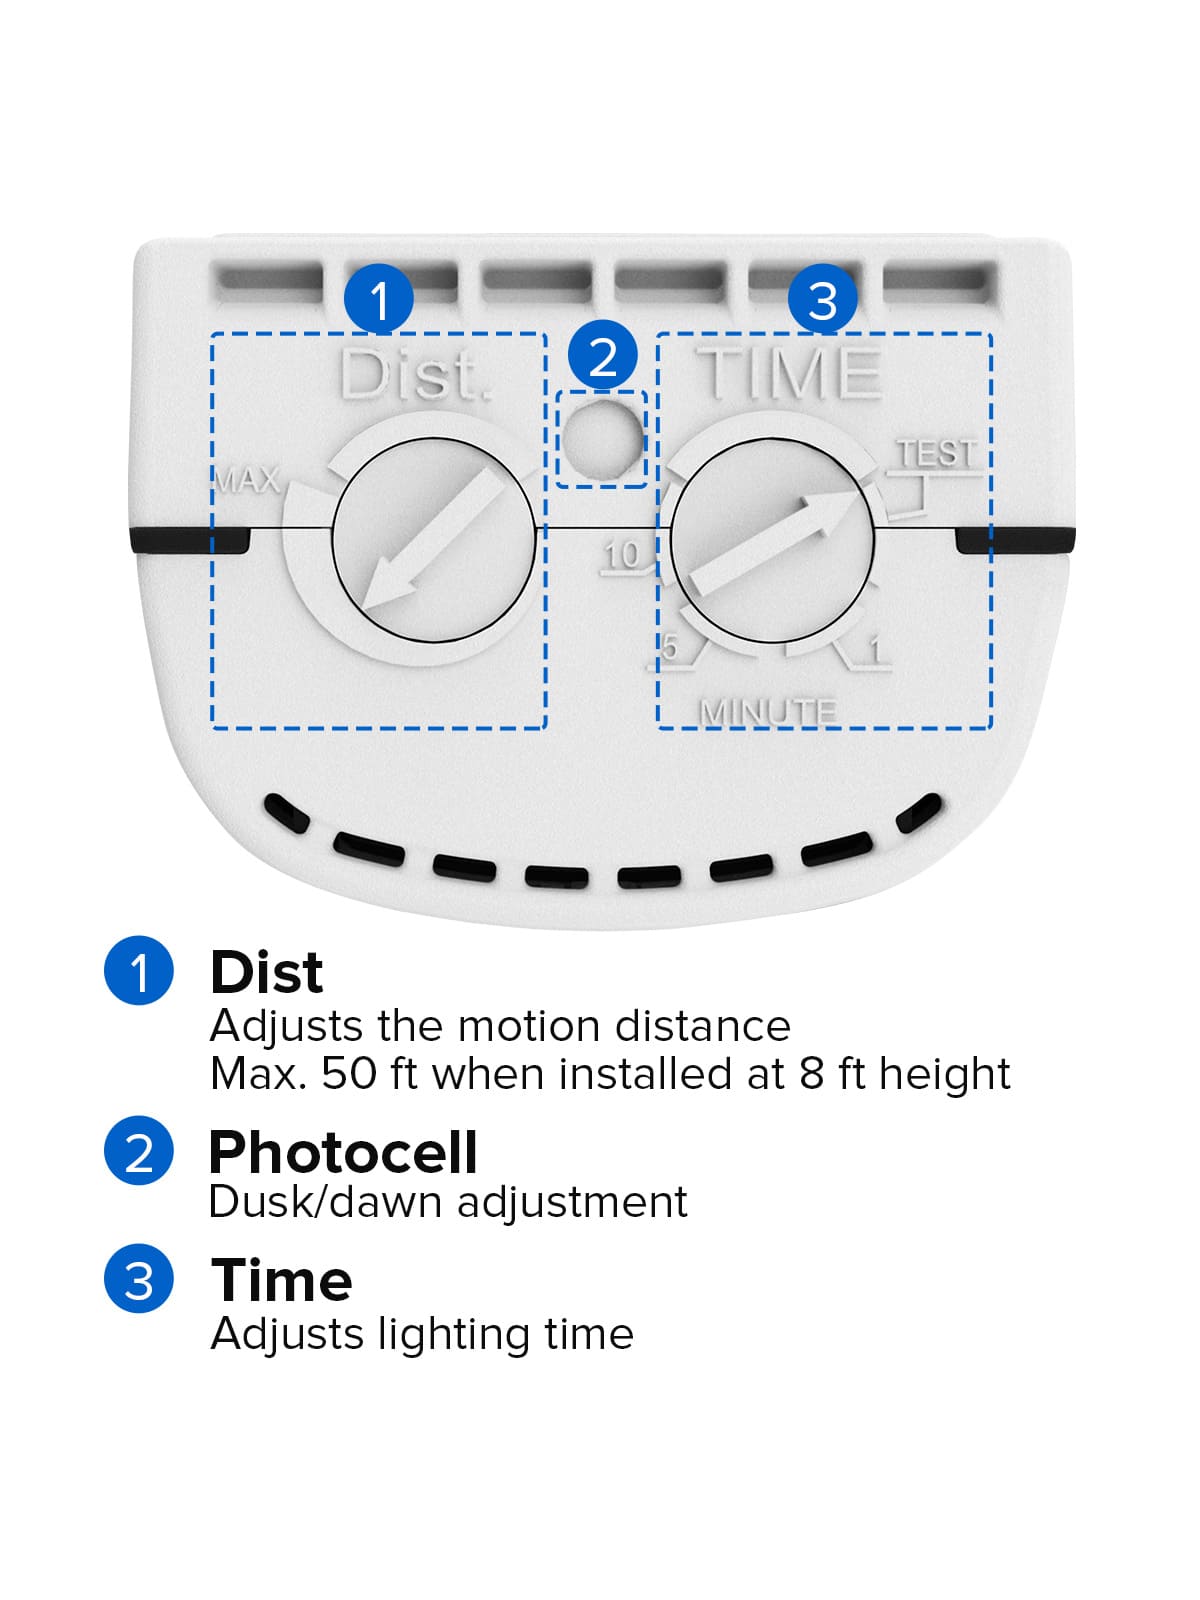
- Auto (Motion Sensor) Mode: Detects ambient motion to turn on the light. Move the pointer to the 1, 5 or 10-minute position to switch to this mode, please don't keep the pointer at the "TEST" position.
- Manual Mode: Manual controls lights keep ON by switch. Move the pointer to the 1, 5 or 10-minute position to switch to this mode, please don't keep the pointer at the "TEST" position.
- Test Mode: Detects ambient motion to turn on the flood light for 5 seconds. Move the pointer to the "TEST" position.

How To Install The Solar Panel?
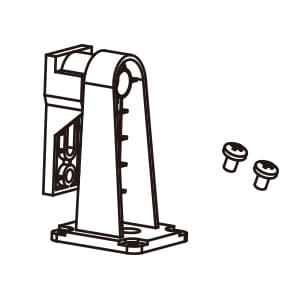
Step 1
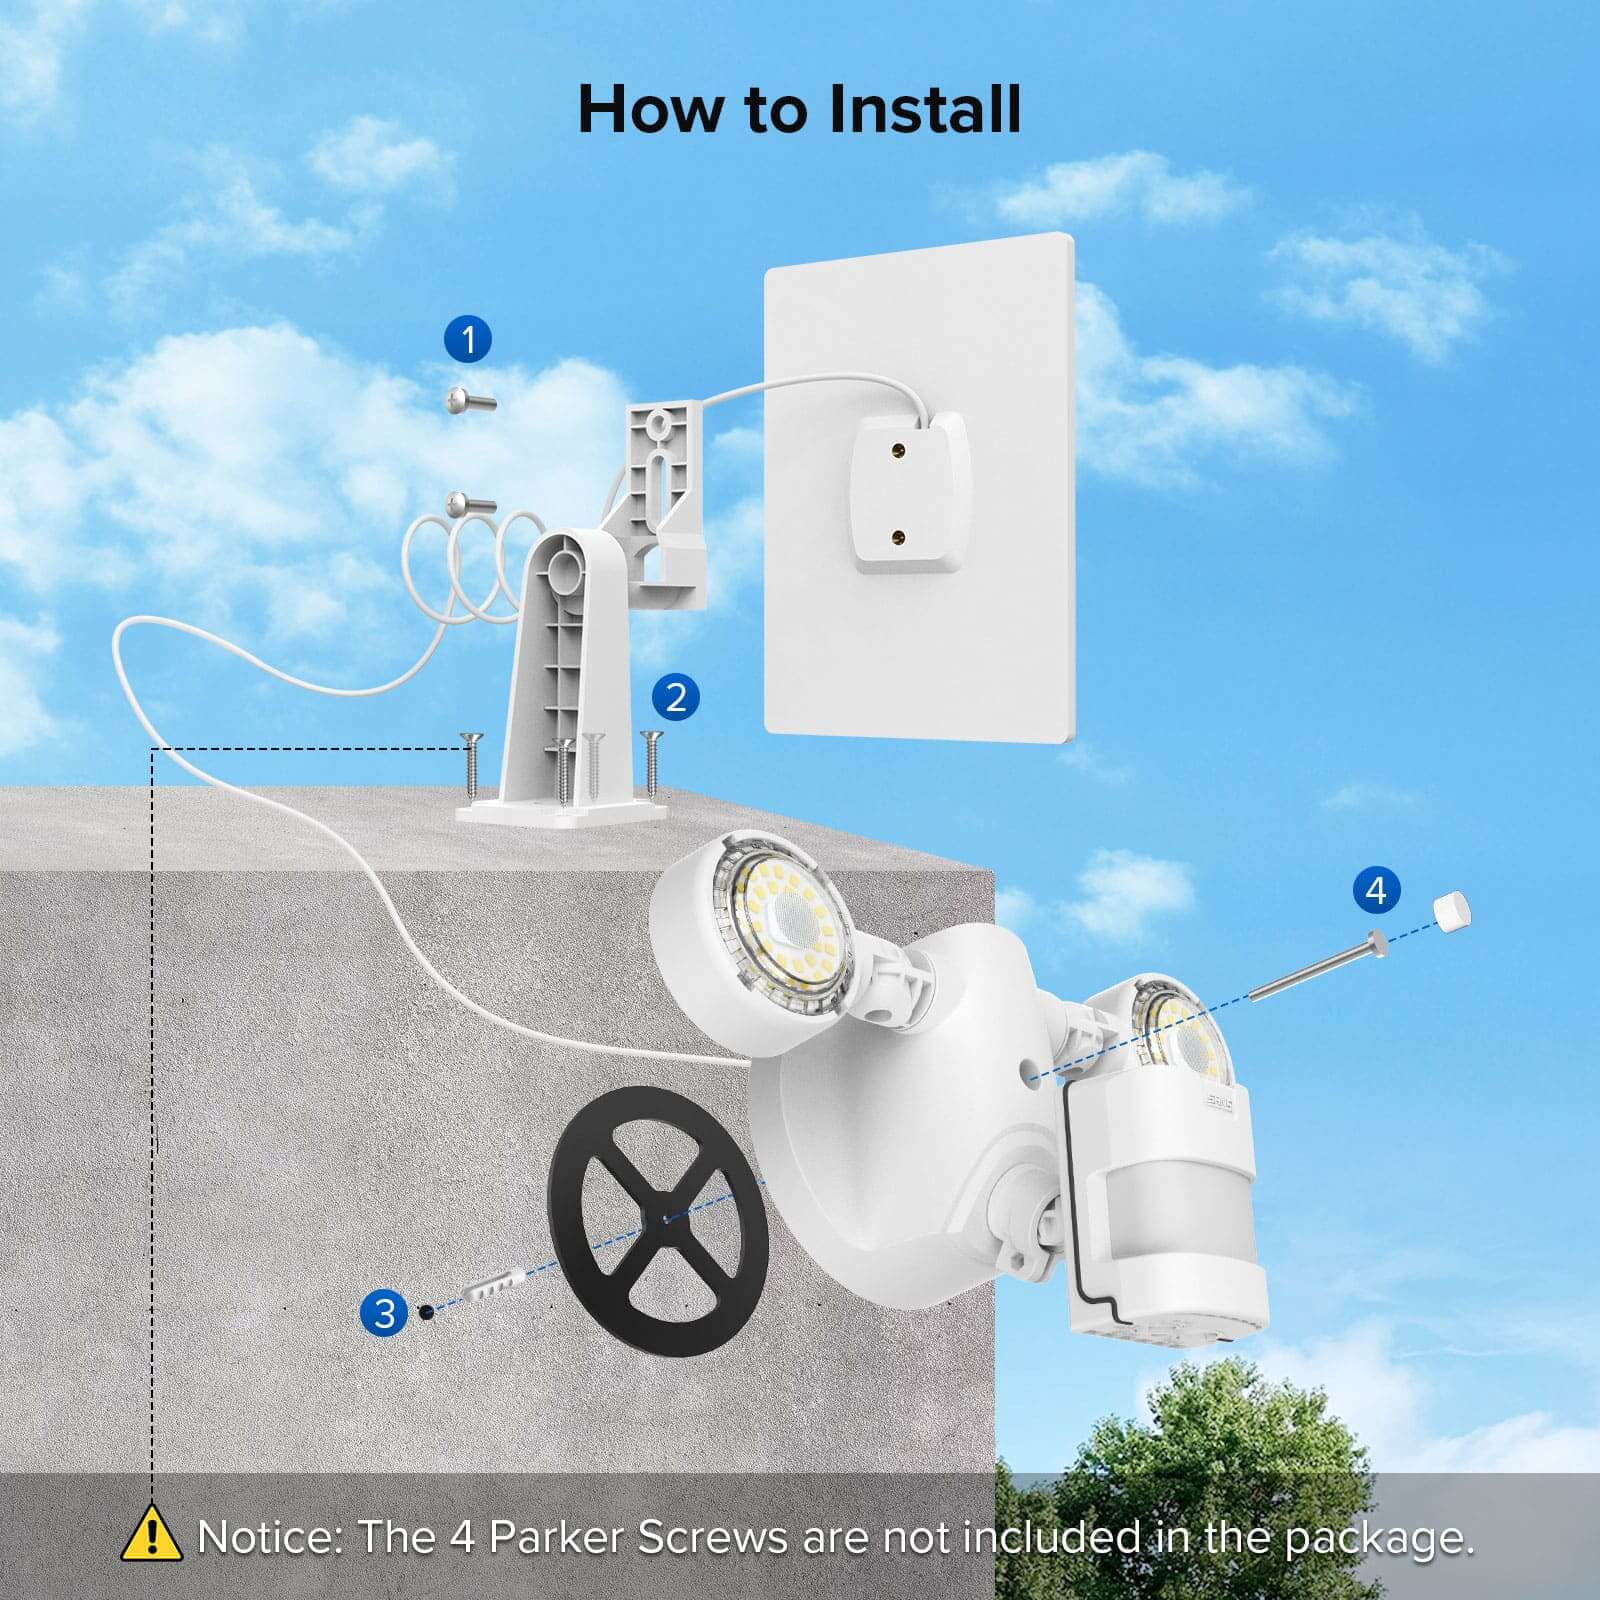
Prepare the stand and mounting screws. Notice: the 4 parker screws needed by installation are not included in the package.
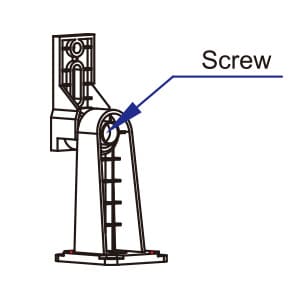
Step 2
Loosen and tighten the screw to adjust the panel of the stand.
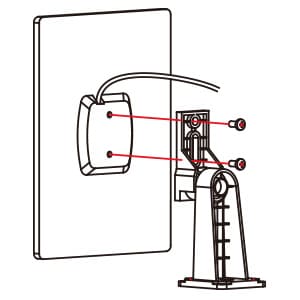
Step 3
Align the holes on the solar panel and the stand board, tighten the screws to fix.
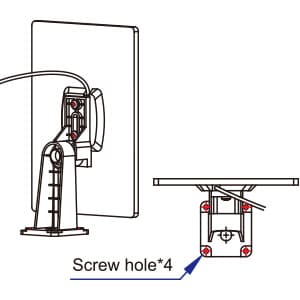
Step 4
Tighten the 4 parker screws (not included in the package) to fix the solar panel onto the desired surface.
How To Install The Security Light?
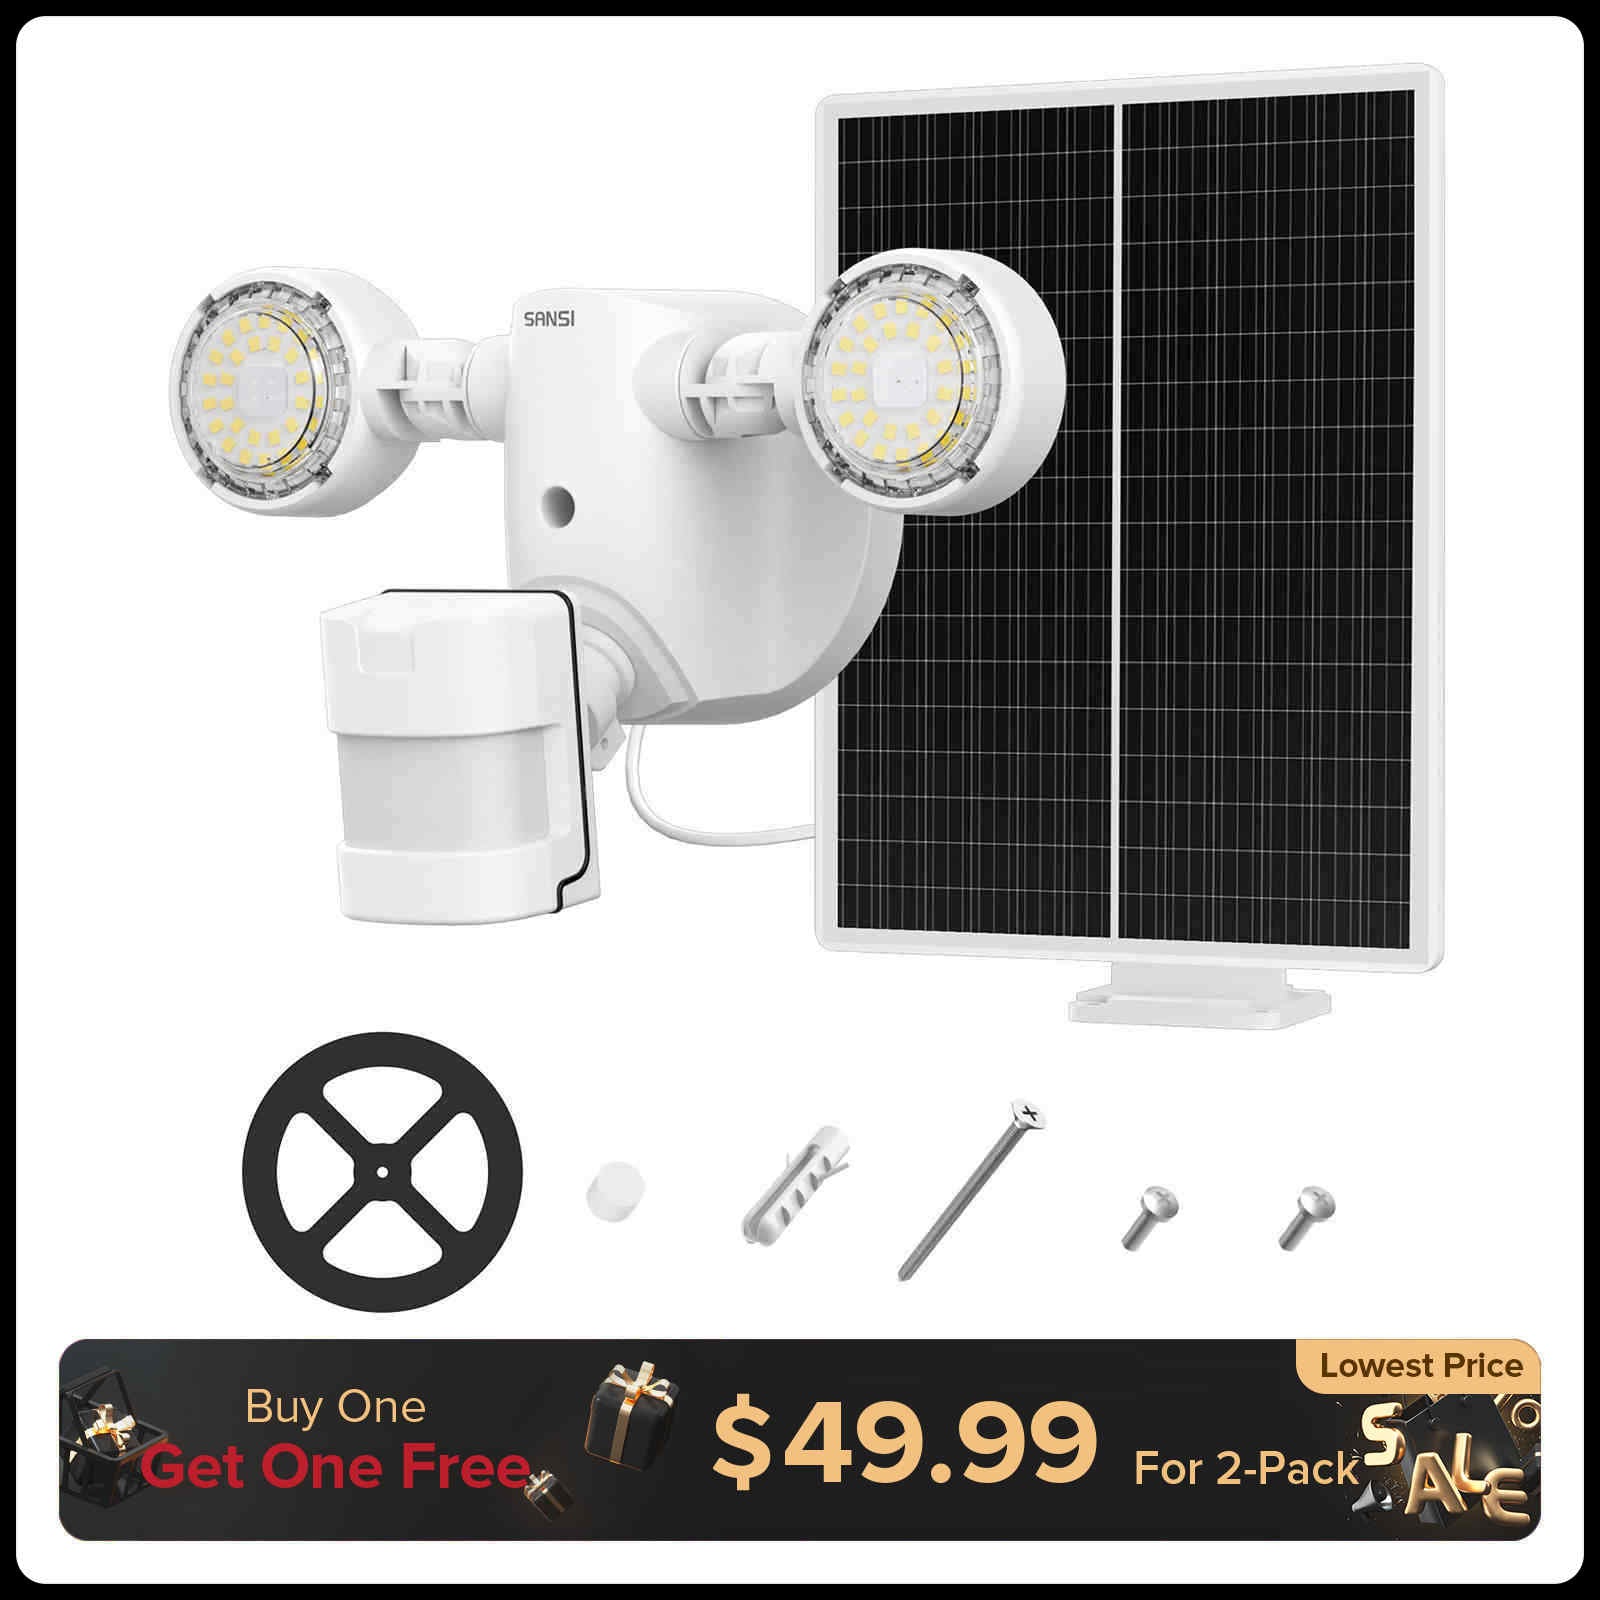
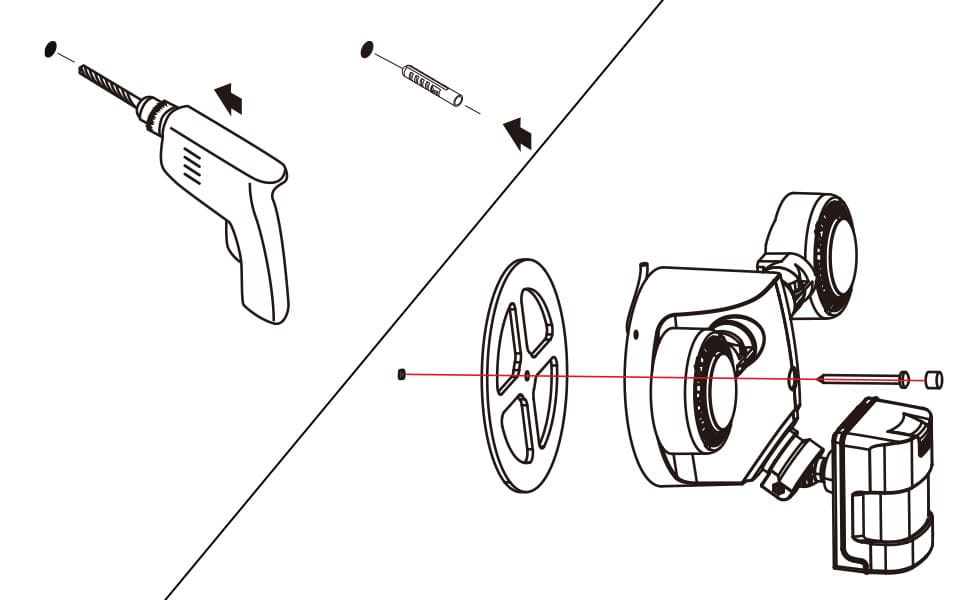
- Use a proper ompact drill to drill a hole (⌀8*50 mm) on the wall.
- Fully insert the nylon dowel into the hole.
- Insert the self-tapping screw through the center of the housing and the rear cover.
- Align the self-tapping srew through the center of the sealing gasket to hold it in place.
- Align the self-tapping srew with the nylon dowel.
- Use a screw driver to screw it into the nylon dowel, til the light is securely fixed.
- Fix the rubber screw cap onto the self-tapping srew.

